Example Instructions Page
Assembly Instructions - 10mm, 15mm, & 20mm
TOOLS NEEDED:
SCISSORS
CRAFT KNIFE
GLUE FOR PAPER
STRAIGHT EDGE
Step 1
Use the scissors to carefully cut out the building's walls. Fold the walls and the gluing tabs. An easier and cleaner fold can be achieved by lightly scoring the fold lines with a craft knife prior to folding. Be careful not to cut all the way through the paper!
Place glue on the one tab and glue the walls together forming a box.
Step 2
Use the scissors to carefully cut out the building's roof. Cut out the small notches to fit around the chimneys. Fold the roof at the ridge line. Make sure the gluing tabs on the walls are properly folded and then put glue on them and on the edge of the chimney notch in the roof. Carefully fit the roof into place and hold until dry.
The basic building is now complete. Proceed to the next steps if you desire additional detail.
Step 3
To add the ruined building, carefully cut out the ruined walls. Fold and assemble in the same way as the main walls in Step 1. Make sure to fold the gluing tabs on the bottom of the walls. Cut out the floor and glue this to a suitable base. Balsa wood or foam core will do well for for this. The base should be painted before attaching the floor. Once the floor is secure, glue the ruined walls to fit on top of the floor.
The building should fit down around the ruined walls.
Step 4
To add the full chimneys, cut out the chimney backs and tops and carefully fold. Glue them to the chimney front and roof. Test fit before gluing! Some trimming may be needed for exact fit. Pieces of plastic tubing or dowel can be used to add chimney pots.
Step 5
To add the dormers, cut out the dormers and their roofs and carefully fold where noted. The large flap folds underneath and connects to the opposite side. This should be glued first and then the roof attached. The finished dormers can then be glued to the main roof.
Assembly Instructions for Garden Walls
Step 1
Use the scissors to carefully cut out the walls. Fold the walls along the two center lines. Cut a piece of 1/8" thick foamboard to the same dimensions as the wall. Apply glue and then fold the paper wall around the foambard and let dry.
Step 2
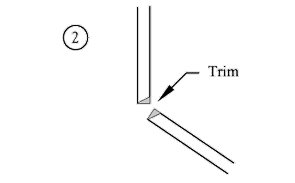
Use the craft knife to carefully cut the walls to the desired lengths. The walls can be trimmed to the desired height and modified to fit sloping ground or around other features. Corner joints can be made cleanly by carefully trimming the ends of the wall to an angle.
Assembly Instructions - 6mm
TOOLS NEEDED:
SCISSORS
CRAFT KNIFE
GLUE FOR PAPER
STRAIGHT EDGE
Step 1
Use the scissors to carefully cut out the building's walls. Fold the walls, roof, and the gluing tabs. An easier and cleaner fold can be achieved by lightly scoring the fold lines with a craft knife prior to folding. Be careful not to cut all the way through the paper!
Place glue on the one tab and glue the walls together forming a box.
Step 2
Fold the roof over and glue to the walls and the gluing tab.
The basic building is now complete. Proceed to the next step if you desire additional detail.
Step 3
To add the ruined building, carefully cut out the ruined walls. Fold and assemble in the same way as the main walls in Step 1. Make sure to fold the gluing tabs on the bottom of the walls. Cut out the floor and glue this to a suitable base. Balsa wood or foam core will do well for for this. The base should be painted before attaching the floor. Once the floor is secure, glue the ruined walls to fit on top of the floor.
The building should fit down around the ruined walls.
ASSEMBLY INSTRUCTIONS FOR GARDEN WALL
Step 1
Cut out two wall sections of identical size. Glue them together and let them dry.
Step 2
Cut the walls in two, lengthways along the center of the wall. This will give you two wall sections.


